Changing Your Own Motorhome Oil
Buying a motorhome is a pretty big expense for most people. Even small motorhomes can eat up over a years worth of wages, and then maintaining the rig so that it lasts long enough to get your money out of it costs even more. Even something as simple as an oil change can take a nice bite out of your wallet these days—a job that typically costs about $25 for a passenger car can cost upwards of $150 for even a small motorhome, and significantly more than that for a diesel rig. Part of the additional cost is due to the fact that motorhome engines tend to take more oil than passenger car and truck engines, but the labor is also inflated for reasons beyond the ken of mortal men, and many shops won’t even touch motorhomes at all due to a lack of sufficient space to work on them.
There’s one crazy little secret that can save you a bunch of money, though. Changing oil isn’t very hard. In fact, it’s downright easy to change the oil on most motorhomes. There are rigs that are a little more difficult to work on than others, but most motorhomes are actually easier to change the oil on at home than your car or truck simply due to increased ground clearance. In many cases, particularly with class A rigs, you don’t even have to use ramps or a jack or anything—just throw down a drop cloth and slide right underneath.
Why Are Motorhome Oil Changes so Expensive?
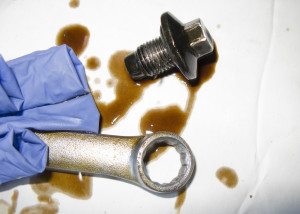
Over-tightening an oil drain plug can strip it. Image courtesy of Robert Couse-Baker, via Flickr (Creative Commons 2.0)
There are a few valid reasons for a motorhome oil change to be more expensive than a passenger car or truck service. For instance, motorhome engines typically require more oil than other engines. This is particularly true of diesel pushers, which can take five or more gallons of oil, in stark contrast to the typical passenger car or truck that only needs four or five quarts. If you have a diesel pusher, then you’re still going to have to eat that cost, even if you change your own oil. However, you may end up paying less for the oil than a shop would charge you. The general public tends to pay more for most parts than shops do, which allows shops to mark the parts up and stay in business, but motor oil margins are notoriously slim, so your mileage may vary.
Another issue with servicing motorhomes has to do with logistics. Few private shops have hoists capable of lifting motorhomes, let alone a facility large enough to fit the rig inside, which means that the oil has to be changed “on the flat.” This is the same way you would change it at home, with the rig flat on the ground, and it typically takes more time and effort than it would to do the same job on a properly hoisted vehicle. And even if the shop does have a large enough facility, and a powerful enough hoist, motorhomes just plain take up a lot of space. Back when I had a shop, one of my hoists was capable of lifting class A motorhomes in the 27-30′ range, but I only did so for a handful of long-term customers. The issue was that while I could service motorhomes, parking was at a premium at my shop, which meant that whenever I had a motorhome on my lot, I had less space for other cars, and it would invariably turn into a headache all around.
Some shops respond to these issues by simply refusing to service motorhomes, others charge a high premium for the service, and others, like mine, only took in a few rigs owned by good customers and charged them the normal going rate for an oil change. If you can find a shop like that, then by all means, avail yourself of their services. If you can’t, then you’ll probably save yourself a good deal of money by just changing your own oil.
Preparing to Service Your Motorhome
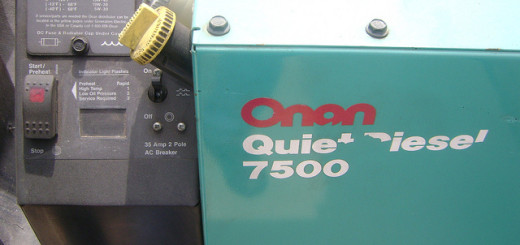
Before you can change the oil in your motorhome, you need three things: the parts, the tools, and the space to do the job. The first consists of enough oil to replace the oil you drain out, a high quality oil filter, and grease. If you have a genset, then you might want to pick up oil and a filter for it too so you can knock out both jobs at once. For tools, you’ll need a wrench or socket appropriately sized for your oil drain plug, a drain pan to collect the old motor oil, and a drop cloth. Depending on your rig, you may also want to pick up an oil filter wrench.
In terms of “space to do the job,” the main concern is that if you rent an apartment, own a condo, or have a homeowner’s association with restrictive covenants, you might not be able to change your motorhome oil where you live. If any of the aforementioned situations apply, you’ll want to check that it’s actually okay to do the job in your driveway before you buy the tools and parts. For instance, it may be fine to change the oil in your rig in front of your condo as long as you don’t leave it parked there overnight, but that will depend on your condo board. In the same vein, some housing developments have covenants that restrict your ability to park an RV in your driveway or on the street, but it may be fine to have it there temporarily to pack or perform service operations.
Changing the Oil in Your Motorhome
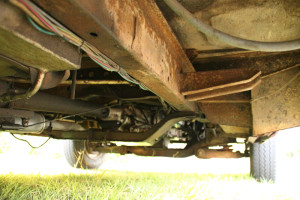
Most motorhomes have more ground clearance than passenger cars and trucks. Image courtesy Damien Quick, via Flickr (Creative Commons 2.0)
Actually changing the oil in your motorhome is remarkably easy. If there isn’t enough ground clearance to slide underneath, then you’ll need to begin by jacking the rig up and placing jack stands under the frame for safety. You can also use your rig’s leveling jacks if it has them, but in that case you may still want to back yourself up with jack stands just in case.
Once there is enough space to slide under your motorhome, you’ll want to spread some kind of drop cloth or plastic sheet on the ground beneath the rig. This will make it easier for you to slide underneath, protect your clothes from the ground, and also help catch any stray oil that doesn’t make it into your drain pan. You can also use a creeper if you have one, but a drop cloth is easy enough to work with that there’s no reason to go out and buy a creeper if you don’t have one.
Before you actually drain the oil, it’s important to make sure that you aren’t going to make a mess. In some cases, motorhomes have crossmembers and other components located directly beneath their oil pan drain plugs. If that’s the case with your rig, then you may find that the oil splashes all over the place when you pull the plug. To deal with this, you can either rig up a funnel or piece of plastic to direct the oil away from the obstruction, or loosen the drain plug very slowly. By controlling the flow of oil, you will typically be able to place your drain pan to catch everything. Remove the drain plug all the way when it is safe to do so, and then reinstall it once the flow of oil has stopped. Tighten it with a wrench until you feel it seat against the oil pan, and then about one quarter of a turn further than that. If you tighten it too much, you may strip the threads.
If you pull the drain plug and find that a red or dark red/black fluid drains instead of an amber or brown/black fluid, you probably pulled the wrong plug. This is a classic mistake that new DIYers make when changing their oil for the first time, but it isn’t the end of the world. If you accidentally drain some or all of your transmission fluid, just make sure to replace it. If you accidentally drain the transmission fluid, don’t realize it, and then add engine oil without actually draining the old engine oil, and then drive your rig, you will do severe damage to both the engine and the transmission.
Changing the Oil Filter
Oil filters are threaded cannisters that screw onto the engine block. When the engine is running, oil passes through the filter and any particulate matter or impurities are filtered out. In order to change the filter on your motorhome, all you have to do is unscrew it slowly, allow the oil to drain down to a trickle, and then unscrew it the rest of the way. If you simply unscrew it all the way to begin with, you may end up with a mess.
You may find that the filter is difficult or impossible to remove by hand. In that case, you can use a filter wrench to remove it. You can also puncture the filter with a screwdriver and use that for leverage, but be careful not to deform the casing too much. If you fail to remove it that way, and the case is deformed too much, it may be difficult to use a filter wrench on it later.
After the filter has been removed, you will want to wipe the mating surface of the engine with a rag to clean it off, and then apply a bit of clean oil to the rubber gasket on the new filter before installing it. When installing the new filter, do not over tighten it, and never use a filter wrench to install a new filter. In general, you will want to tighten by hand until you feel the filter seat against the mounting surface, and then tighten it another three quarters of a turn.
Lubricating Your Motorhome
Traditionally, oil changes were often referred to as “lube-oil-filters,” or LOFs, because the job involved lubricating suspension and steering components in addition to changing the oil and filter. Most modern passenger cars and trucks have tie rod ends and other components that are sealed from the factory, preventing lubrication, but the same isn’t true of motorhomes. Your rig almost certainly has components that can be lubricated, and you will want to obtain a grease gun and a tube of the appropriate grease before you service it.
Since every rig is different, you may want to find a diagram of your particular make and model that shows the lubrication points before you do the job. You can simply slide under the rig and look for zerk fittings, but you may miss some if you don’t have a road map going in. The actual process of lubricating the various components is very simple—just slide the grease gun nozzle onto each zerk fitting and squeeze the trigger to apply grease.
Changing Your Generator Oil and Filter
If you’re already changing your motorhome oil and filter, you might as well hit the genset at the same time, provided that it’s ready for the service. Unlike your engine oil, which you change based on either time or miles driven, you change the oil in an RV generator based on time or hours ran. The job itself is similar to changing your engine oil, and depending on how easy it is to access the genset, it may even be easier. Just remove the drain plug, drain the oil into a pan, and replace it. Then do the same with the filter, which you will replace with a new one. Most gensets use cannister filters just like the one on your motorhome’s engine, which makes the job pretty easy.
How Often Do You Change Your Motorhome’s Oil?
There is a lot of disagreement about how often you should change the oil in a motorhome. A good rule of thumb is to change it twice a year, regardless of how much use the rig sees, but there are just about as many opinions out there as motorhome owners, and every one convinced he or she is right. If all else fails, check your owner’s manual and just go by that.
Other Important Checks
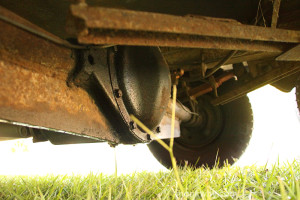
When you change your own oil, make sure to check other items like your differential fluid. Image courtesy Damien Quick, via Flickr (Creative Commons 2.0)
When you have your oil changed, the tech will usually check a bunch of other things. It may seem like they’re just looking for things to upsell you on, but an oil change is really a good time to make sure that your other fluids are in good shape. So while you’re changing your oil, also make sure to check things like:
- Differential fluid
- Antifreeze
- Brake fluid
- Transmission fluid
- Power steering fluid
- Tire inflation

